Summer is well underway and that means many art shows have already been attended and prepared for. I have only two left for the season, with one just into the fall. This year will be my ninth year traveling to area festivals! Seems like just yesterday I was fumbling around trying to figure this all out…oh wait, I still am! 😉
Over these nine years, I have picked up on some tips and tricks I thought I would share with you on the chance you are hoping to start your own art business or looking for ways to improve. Any business that involves customers walking into a space you created can benefit from change, restructuring and growth.
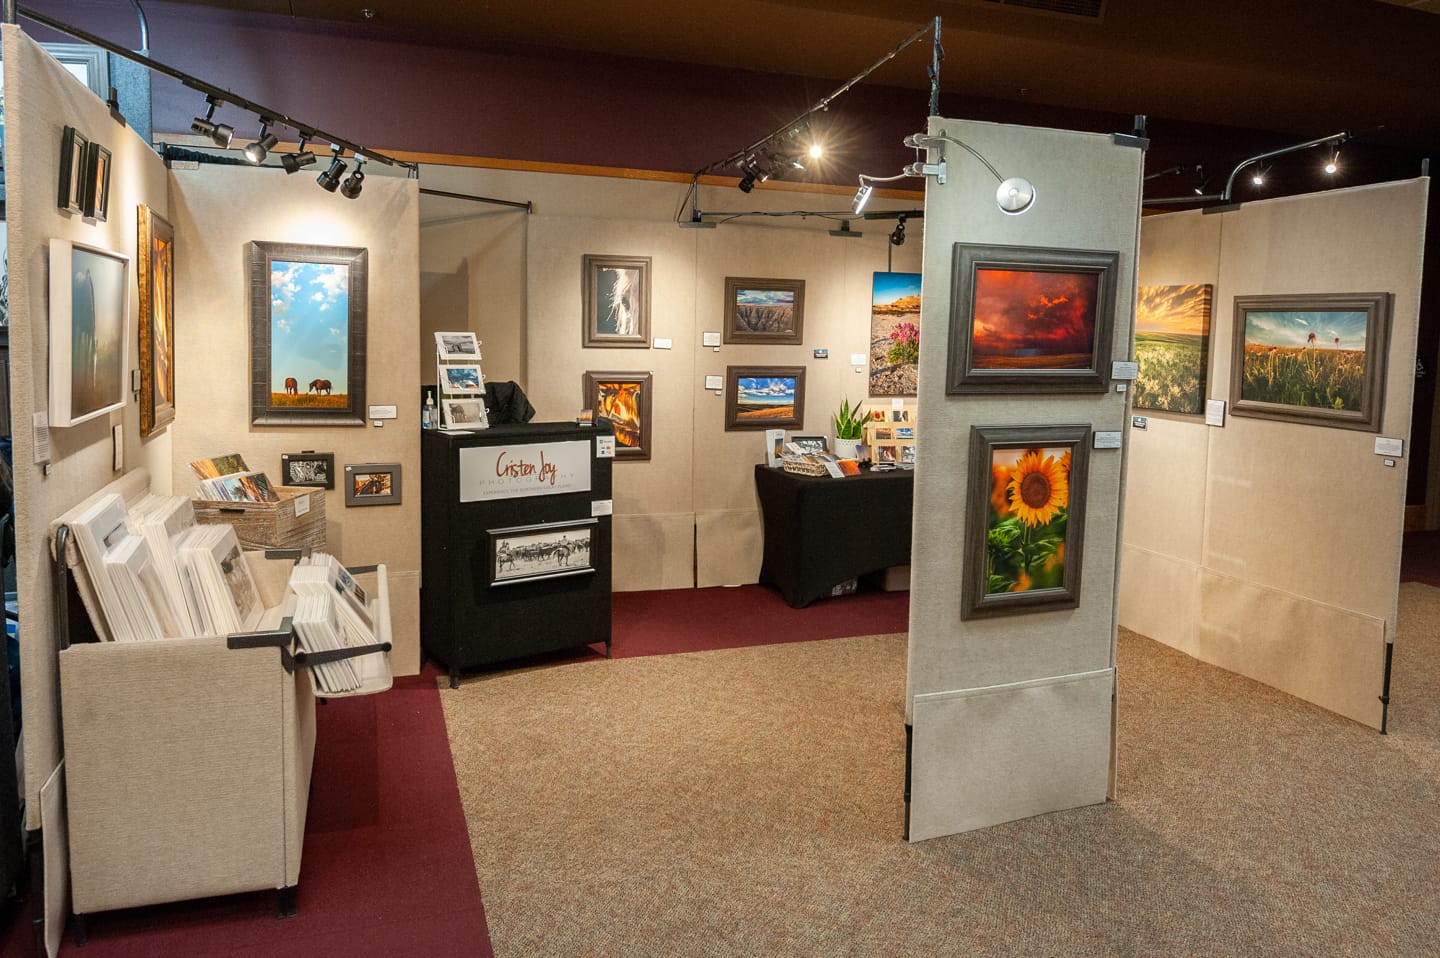
The time and effort put into creating these art show booth spaces really says a lot, at least to me, about the seriousness of the artist or crafter. You have spent so many hours dreaming, planning, creating. You don’t want that to be wasted when you finally present your work to the public.
Please note, these are my opinions from what I’ve changed in my booth and what I’ve observed as a customer. When I started out, I had no idea what I was doing. I analyzed, observed and picked up many tips from other artists I admire and who’s booths are just beautifully presented. All these tips I implement in my business and have seen the benefits! Hope they will be helpful to you, too! 🙂
Tips for a great Art/Craft Show Booth
- Art is for sale, not on sale. Unlike the trending summer apparel or fresh produce, art does not have a season that will be passing and go out of style. There is no expiration date. If you have works that are older and haven’t sold, change their value. Art is not the same type of business as the grocery store or boutique, it should not be marketed as such in your pricing. The only sale I do is a pre-order sale for my calendars, bulk pricing for cards and coasters. I do this since I get a bulk discount when I purchase the materials (except for the prints in the cards).
- Where you sit in your booth matters. If customers are tripping over you to get into your booth, or your booth entry is crowded, I highly recommend reformatting your point of entry. You want it clean and free of clutter yet welcoming and not sterile. I always sit behind a desk. Or a table. You don’t want to hinder people from looking. One way I suggest as you figure out how to create your booth is draw out the shape of your booth and start with the top three most important items needed in your space. Table, spinning card rack, etc. Draw them into your booth and then slowly add what else is most important. If your paper is looking too crowded, so will your booth. This is based on my personal perspective which feels that when a space is overly crowded that means over-stimulation. Over-stimulation will cause many potential clients to feel overwhelmed and leave as soon as possible.
- Eating in your booth. We all need to eat, especially when you’ve been at your booth all morning and it’s very busy! I know there is some school of thought that an artist should never eat in their booth. I disagree, especially for artists who travel alone as I do most of the time. I think it can be done both discreetly and professionally. This is where a desk to sit behind comes in handy. You can hide your food items when a customer comes into your booth. Or, if your desk is in the back and you have a back door, you can step out and hide behind the rest of your booth while keeping an eye on the entry.
- I was at a craft show this past winter and the booth owner sat right in front on a folded chair and was very plainly chowing down on her food. I practically tripped over her. She seemed more interested in her plate of vittles than in my being there. It felt very unbusinesslike and rude.
- Create height. If all your wares are laid flat on a table, that causes your buyers to bend over to look and if they’re on the taller side it’s just really uncomfortable. Keep their eyes up. Use the vertical space. It helps organize and add interest to your booth.
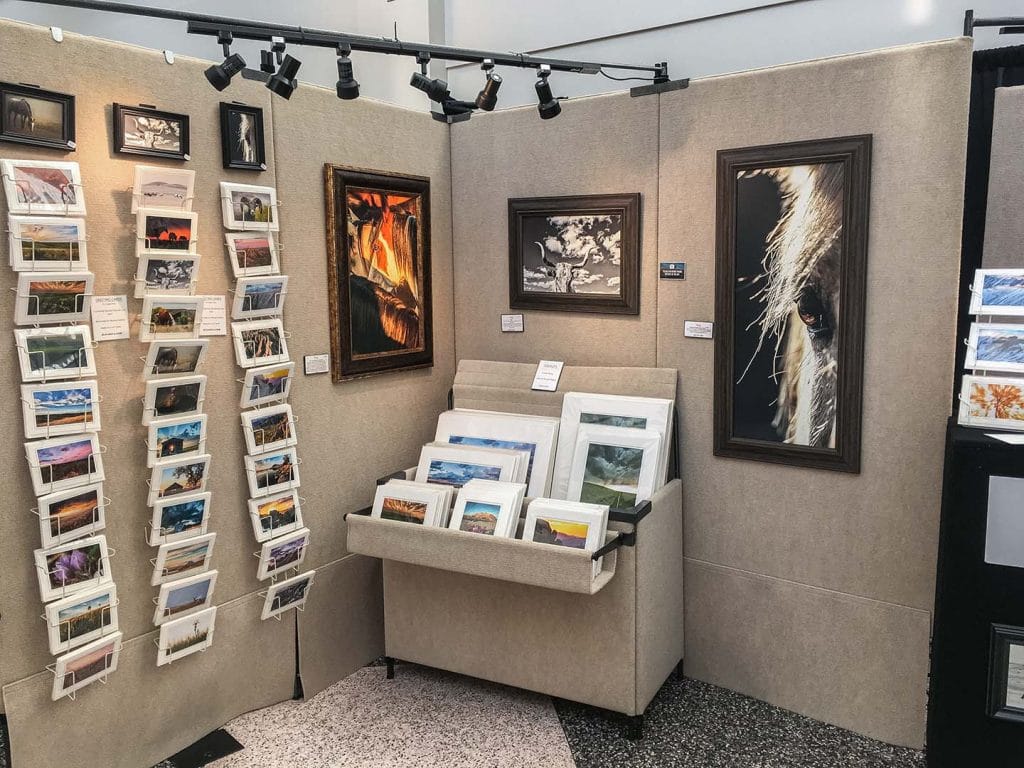
- Keep your customers eyes in your booth. You paid for the space, use it well! As budget allows, have some kind of walls that will separate your booth from the neighbors. Use grids, panels, sheets or height on your tables that will keep your buyers’ eyes within your booth. While your customers are in your booth, you want their attention to be on what you have to offer while they are in your space, not on what they can see the neighbors have.
- Smile. Say hello. And then let them look alone. If something is of interest, they will ask questions. Stay off your phone as much as possible when customers are in your booth. Be available. If your visitors seem to be browsers, don’t jump down their throat with all your sales, deals and info. Have that information out for them to easily take. Don’t pressure anyone into taking a business card or beautiful brochure that you’ve created. If they really want it, they will pick one up. Nothing says tacky salesperson than trying to give someone something they don’t want.
- List your prices! This one gets controversial, especially in the art world, but in my opinion and experience as both a buyer and an artist, have your prices visible. They don’t have to be big and loud, just there.
- If you sit at your booth, sit with your arms down. Don’t sit with your arms across your chest. It looks grumpy and unapproachable. Smile, be open. You have paid to rent this space at this show. Look like you care. This is another reason why I invested in a desk, it creates comfortable space between you and the customer.
- Sit at eye level. Similar to what I shared about creating height for your art, the same goes for you. I purchased a tall directors chair that is comfortable and it’s made a huge difference for me. Visitors in your booth will often chat and purchase, giving them the chance to look you in the eye while they are talking is more comfortable for both of you than looking down at you. What you invest in for your booth, such as risers for your tables and a tall chair, will pay off in the end. Here’s the chair that I have and love! It’s high with a space to place your feet to rest, and the seat is flat across the bottom. I don’t like chairs that sag when I sit. The back is also very comfortable for leaning into, without crossing your arms. 😉 And it comes with a swell zipped case with a carry strap.
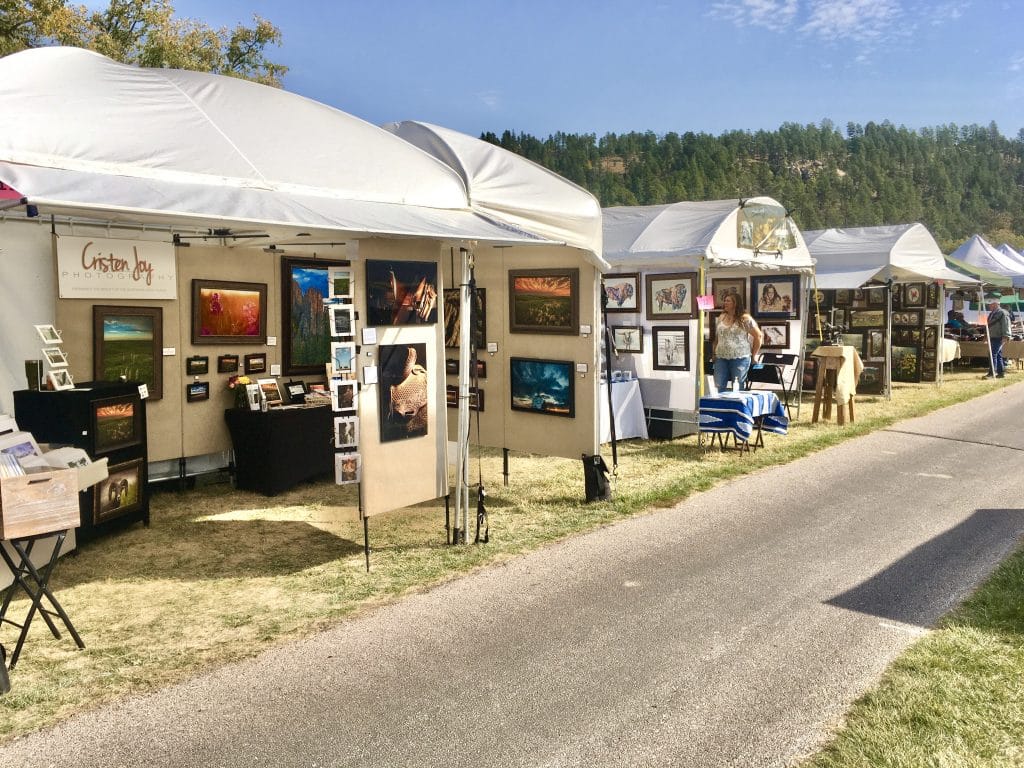
Tips Specific for outdoor Shows
- Anchor your tent more than one way, especially if the show is over several days and you will be leaving your tent set up. Not only will this protect your tent, but it will also protect your neighbors tent.
- I stake my tent three different ways: into the holes at the bottom of the poles with tent stakes, ratchet straps connected to the loop at the corner of my tent roof to dog stakes which anchors down each corner, and I use bagged weights at each corner.
- I’ve had the unfortunate privilege of a neighbors tent blowing into mine during the night because only short stakes were used. Fortunately, no damage occurred and I had wonderful friends who went to my aid before I got there.
I really love creating a space to display my photography, it’s a fun part of the creative process. If you have any questions, I would love to help! Enjoy the show!